How to Import Contacts into Airtable
Manual imports are slow and messy. LinkAir adds verified LinkedIn contacts to Airtable instantly, saving hours while keeping your CRM data clean.
Published on August 29, 2025
Sync leads from professional networks to Airtable.
Save 4hrs per week on CRM data entry.
Learn more...Free Airtable integration
Keeping your Airtable base updated with fresh contacts is essential for any growing business. A well-organized contact list is the backbone of your sales and marketing efforts. However, getting that data into Airtable can be a tedious, time-consuming process. At Add to CRM, we've seen countless teams struggle with manual data entry and clunky CSV files. That's why we created this guide.
We'll walk you through the traditional methods of importing contacts into Airtable. But more importantly, we'll show you a much better, automated way to do it—a solution we built to solve this exact problem.
Preparing Your Data for Import
Before you even think about clicking "import," preparing your data is a critical first step. From our experience helping businesses streamline their CRM processes, getting this right from the start saves a lot of headaches later. Here are our top tips:

- Use a Clean CSV File: While Airtable can handle pasting from spreadsheets, a Comma-Separated Values (CSV) file is the most reliable format. Ensure your file is saved with UTF-8 encoding to avoid issues with special characters.
- Create a Header Row: Your spreadsheet's first row should act as a header, with clear titles for each column (e.g., "First Name," "Last Name," "Email," "Company"). Airtable uses these headers to guess the correct field type, so make them descriptive.
- Scrub Your Data: Manually clean your list before importing. This means correcting typos, standardizing data (like using "CA" instead of "California"), and removing any contacts you know are outdated. This step alone can be incredibly time-consuming.
- Check for Duplicates: Scan your file for duplicate entries. Importing duplicates creates messy data that can lead to embarrassing and inefficient outreach. You'll have to clean them up later if you don't catch them now.
Manual Import Process
Once your data is prepared, you can begin the manual import process. We've observed that while this method works, it's filled with tedious steps that consume valuable time that could be spent on selling.
- From your Airtable base, click on the
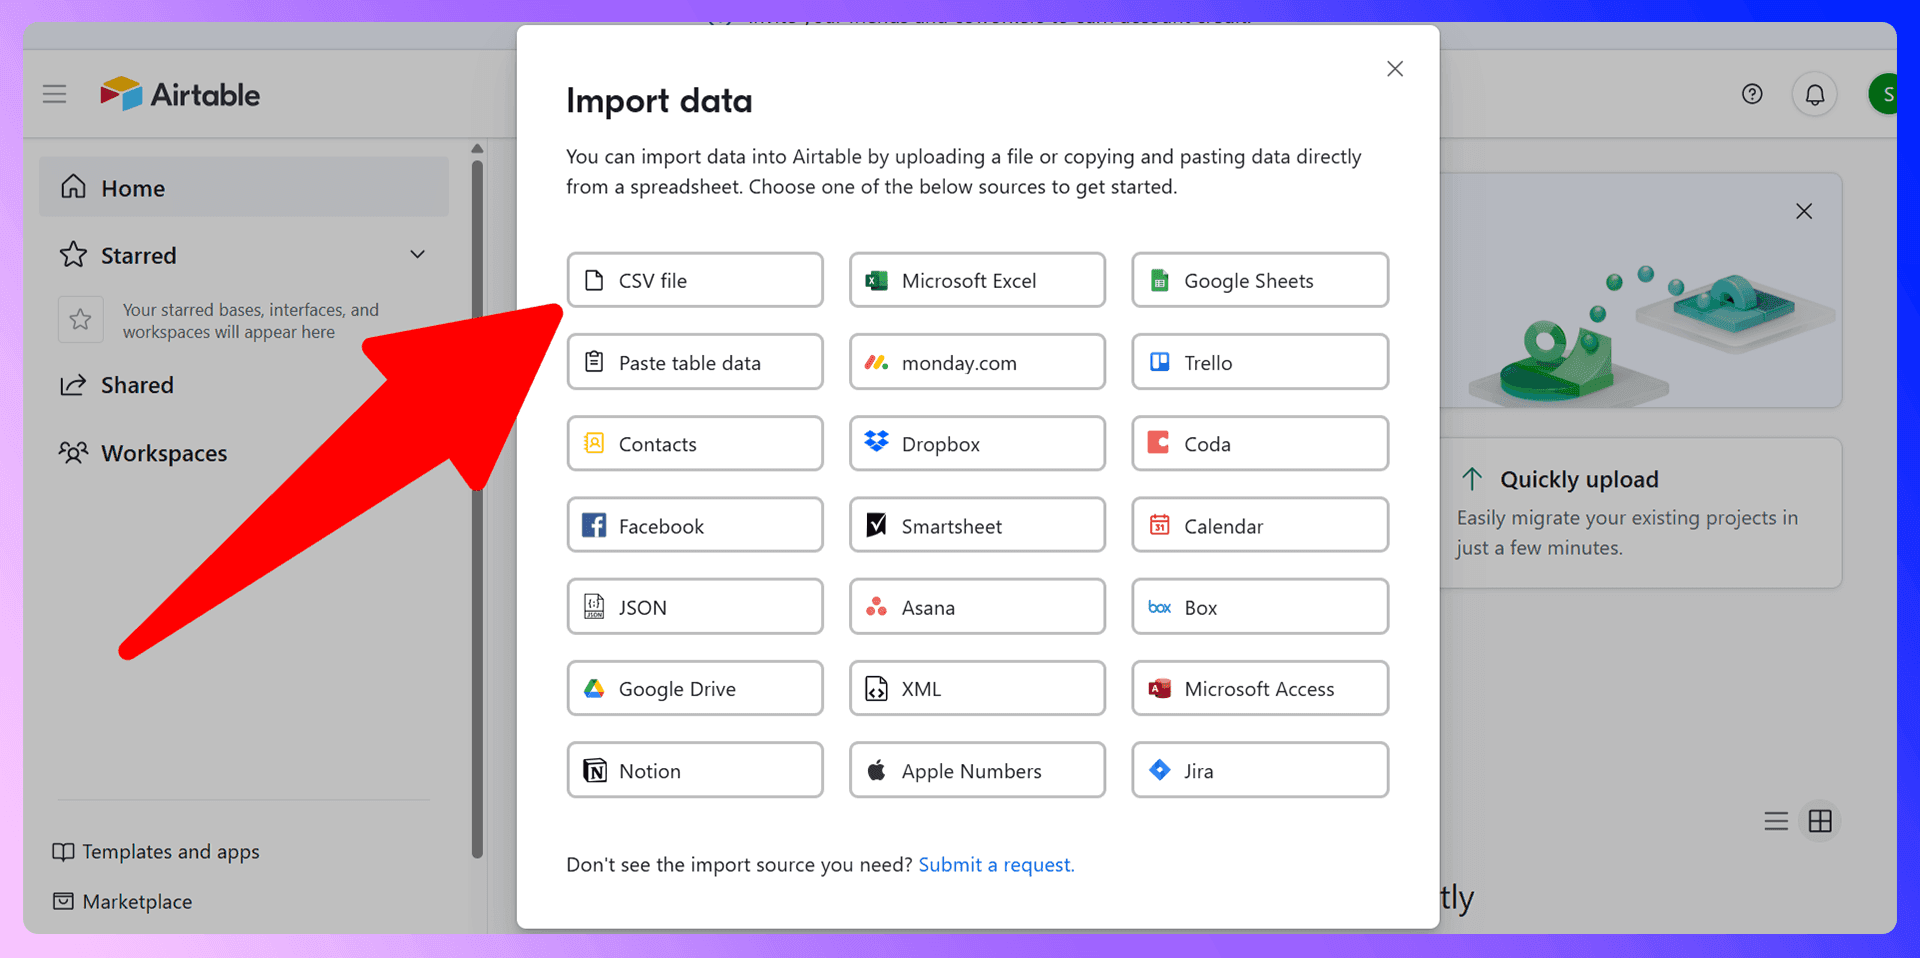
+sign to add a new table. - Select the "Import data" option.
- Choose "CSV file" as your source.
- Drag and drop your prepared CSV file into the uploader and click "Upload."
- Airtable will now show you a preview of your data and attempt to automatically assign a field type to each column.
- This is the most error-prone step. Carefully review every single column. Airtable often misinterprets data, labeling an "Email" column as "Long text" or a "Phone" column as a "Number." You must manually click on each header and select the correct field type (e.g., Single line text, Email, Phone number).
- Once you've corrected all the field types, click the "Import" button.
Handling Duplicates and Data Validation
Airtable's standard CSV import does not automatically merge or flag duplicates. If you import a list with contacts already in your base, you will create duplicate records. To fix this, you have to use the "Dedupe" app from the Airtable Marketplace after the import is complete, which adds another manual task to your workflow.
Supported Field Types
When importing, you'll need to map your data to Airtable's field types. For contacts, the most common ones we see are:
- Single line text: For names, job titles, and companies.
- Email: For email addresses.
- Phone number: For contact phone numbers.
- URL: For website or LinkedIn profile links.
- Long text: For notes or detailed descriptions.
- Single select / Multiple select: For status, tags, or categories.
Import Limitations
The biggest frustration we've seen clients face isn't just file size or row limits (which depend on your Airtable plan). The true limitation of manual importing is the time and effort it requires. The process is rigid, error-prone, and requires constant vigilance to ensure data quality. It was seeing this recurring struggle that led us to create a better way.


Skip the CSV. Import contacts to Airtable from LinkedIn®
AddToCRM enriches LinkedIn® profiles with verified emails and phone numbers, then syncs them to Airtable instantly.
Get 5 Free LookupsImporting Contacts using LinkAir
We kept seeing our clients waste hours each week formatting spreadsheets and correcting import errors. We knew there had to be a more efficient way. That's why we developed LinkAir, our solution to eliminate manual contact importing from LinkedIn for good.
LinkAir is a Chrome extension that finds verified contact information from LinkedIn profiles and automatically adds them to your Airtable base with a single click. We built it to bridge the gap between where you find prospects (LinkedIn) and where you manage them (Airtable), saving you hours of manual work.
Benefits of using LinkAir
LinkAir is a Chrome extension that finds verified contact information from LinkedIn profiles and automatically adds them to Airtable. We developed it to be superior to manual importing in every way:
- Speed: Add a new contact in one click, directly from their LinkedIn profile. No more spreadsheets or data mapping.
- Accuracy: Get 96% accurate, verified email addresses and phone numbers. This eliminates data entry typos and reduces email bounce rates.
- Efficiency: LinkAir works where you work. Stop switching between tabs and copy-pasting information. The entire process happens inside LinkedIn.
- No Formatting: Forget about cleaning CSVs or correcting field types. LinkAir automatically maps and formats the data correctly for your Airtable base.
How to get started with LinkAir
Getting started is incredibly simple:
- Install the LinkAir Chrome Extension.
- Go to a person's profile on LinkedIn.
- Open the LinkAir extension to find the person's verified contact details.
- Click 'Add to CRM' to instantly add the person to your Airtable base as a new record.
Other Import Methods
While manual CSV uploads and LinkAir are two primary methods, Airtable offers a few other options for specific use cases:
- Copy and Paste: For very small datasets, you can copy cells directly from Google Sheets or Excel and paste them into Airtable to create a new table.
- Airtable Sync: This feature allows you to set up a one-way, live connection from external tools like Salesforce, Jira, or Google Calendar. It's best for syncing entire datasets that need to be kept up-to-date automatically, rather than for one-off imports.
- Marketplace Apps: The Airtable Marketplace has specialized apps, like the Contact Import app for importing vCard files (.vcf) or the XML Import app for pulling data from RSS feeds.
Verified emails, straight into Airtable
AddToCRM enriches LinkedIn® profiles with verified emails and phone numbers, then syncs them to Airtable instantly.
Get 5 Free LookupsImporting from LinkedIn
If you frequently gather leads from LinkedIn or other online platforms, consider using third-party tools like LinkAir , our Chrome extension for Agile CRM. With LinkAir, you can:
Capture Verified Emails:
- Extract verified contact details directly from LinkedIn profiles.
Add Contacts in One Click:
- Quickly add contacts to Airtable CRM without manual data entry.
Save Time:
- Streamline your lead generation process by automating contact creation.

Learn more about Airtable and how it can improve your workflow.
Try LinkAir Today
Manual importing works, but it's a relic of a bygone era. It's slow, inefficient, and prone to errors that can cost you time and opportunities. We invested in building LinkAir because we believe your time is better spent building relationships and closing deals, not wrestling with spreadsheets.
Stop wasting hours on data entry. Streamline your workflow and ensure your Airtable data is always accurate and up-to-date. Try LinkAir for free today and get hours back in your week.
Add contacts to Airtable from LinkedIn®
Enrich profiles with verified emails and phone numbers. Sync to Airtable in one click.
Try Airtable Extension7-day free trial
Save 4hrs / week on Airtable data entry.
Find verified contact info for your prospects on LinkedIn®, Gmail, Outlook & company websites. Add them to your Airtable with 1-click.
Trusted by 1000s of founders, SDRs & more